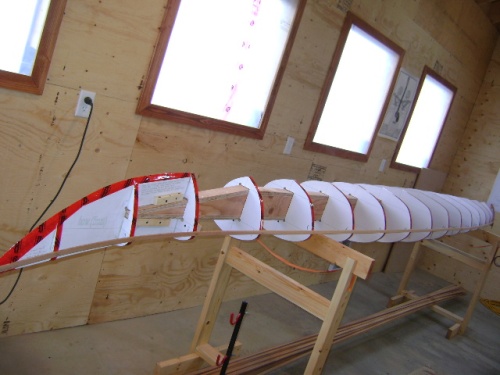
I thought that I would have updated the blog when I put my first strip on, but it wasn’t to be. With that said, I now have 5 strips on each side and the stripping is getting easier with each strip. The first strips were kind of a pain in the ass as I was lining them up with the sheerline and twisting and bending them to make them fit. Unfortunately, it wasn’t until I had milled almost all the strips that I later learned that I needed 2 strips to start that had a double cove on them. Luckily, I hadn’t taken the bit out the the router table and I just ran 2 strips through the bead side. I ran the strips through twice to make sure I had the proper depth of cove and it seemed to work OK.
Fitting the strips was a little tricky at first, but I think they turned out OK. I’m fairly happy with the joints at the bow and stern so far and will later add a small stem band to offset it. I was thinking hard about adding a larger stem band, but decided that I liked the idea of the flowing wood for this build. I may decide to do one on a later build, but for this one I wanted to keep it fairly simple and concentrate more on technique rather than bling. For the most part I’m going to use the same colour wood for most of the hull and play around with a design on the bottom. The western red cedar is a nice colour and it gets darker near the bow, so it will give the kayak some character I hope. Just thinking of designs can be mind boggling as there is so much you can do. I’ve looked at a lot of pictures and some people have done some amazing stuff, but I am drawn to the boats that don’t jump out at you screaming “look at me”. I’ve got some design ideas for the deck but I think I’m going for the understated elegance look ~ which could be difficult to do nicely. Just the lines of a kayak are so elegant and beautiful that I’d like to accentuate that. There are so many ideas and techniques out there that I think that some builders want to try everything and it kind of draws your attention away from the actual kayak and focus’ more on the building technique ~ which is fine, but not what I want to do with this build.
For the past 5 days I’ve been putting a strip on each side, stapling them in place, clamping, and letting the glue dry overnight. I’m probably being a bit anal, but I want to make sure that the first 5 rows are solid as they are the foundation for the rest of the kayak. After 5 rows I can already feel it getting stiffer and can only imagine what is to come. I’ve also been checking the stations for alignment with a string everyday and making sure everything is level and where it is supposed to be. I’ve noticed that it has moved a hair on a couple of stations (not side by side), but nothing that I am going to worry about. Now that I have the first 5 rows done I can start doing a few rows a day. For the most part, they strips are going into place easily, even at the ends where it just takes a little more patience getting everything lined up right. I’ve been going from bow to stern and this system has been working fine so far. I have been pretty good with cleaning up the glue squeeze out and I’m sure I’ll get the rest when it comes time to start sanding.
It’s a really good feeling to actually start to see the kayak come into shape. I’ve been doing a lot of prep work ~ building the stands, milling the strips, cutting out the stations,building the spine, and aligning and setting up the stations on the spine that its actually a really nice feeling to start working on the kayak. It feels like I went over a hump, although I know that there is still A LOT of work to do before this kayak gets wet.
Here are some pictures and it’s time for bed …


The first of many strips to follow

From the bow looking back


I like blue tape!

The colour gets darker as it nears the bow
Leave a comment